Logging in🔗
You can ask users to login or create a GuidedTrack account. The benefits of doing so are:
- allowing users to easily save their progress even when they return to your program from a different browser or computer
- tracking users who are completing a set of different programs (e.g., two parts of a questionnaire)
Users who are logged into your program will be given a "Sign out" option from the hamburger menu (≡).
You can either change the settings of your program so a login screen is presented immediately when any user opens the run link to your program, or you can present a login screen somewhere in the middle of your program.
Adjust the settings to make the login screen appear in the beginning🔗
You can arrange it so that each and every time a user opens the run link to your program, they are encouraged (or required) to sign into GuidedTrack (if they are not already signed in).
Once they sign in, they will be transported to the very last screen they visited in your program (even if they are accessing your program from a different computer or browser). If they have never taken your program before (or they fully completed their run last time), then they will start from the beginning of your program.
There are some caveats in which the login feature may be faulty if you make changes to a screen the user is on, so do be sure to see the "Important note" below before implementing this feature.
You can control whether or not users should login to your program from the "Settings" tab. To get there, click on a program from your "Programs" screen, then click "Settings."

From there, you'll see an option called "Login settings," with three options:
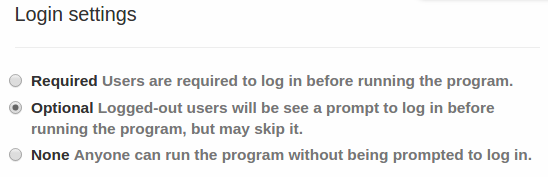
Required: This is great if your program is highly complex, and users will need to take it in multiple sittings, and/or if the same users will be taking a bundle of your programs and you need to track them.
Optional: This is nice if your program might take a while to finish and you'd like users to have the option of completing it in multiple sittings across devices, or if the program can be taken multiple times and you want to give users an option to store their past answers.
None: This is the best option if your program is short and simple.
Of course, you may not always want the login screen to appear just in the beginning of the program. You may also want it to appear toward the end.
Using the *goto keyword can also give you more options for introducing a login-required program.
Important note: It can be risky to make changes to your program once you already have users who are actively taking it. If you plan to change your program while you have live users, try enabling version control. You may also want to turn off the "Reset everything" option from the hamburger menu (≡).
Add a login screen in the middle or end of the program🔗
This option is especially useful if you've given users the option to login in the beginning of your program, they turned you down, and now you either want to give them a second chance or demand that they login. It's also useful if users will be completing your program in one sitting but you want them to login on the second screen or so in order to better track their responses (e.g., if they are taking a set of questionnaires from you).
To do that, you can throw a *login keyword into your program wherever you'd like.
The basic syntax looks like this:
In order to take this super awesome program you must login to an existing account or create a new one.

*login
	*required: yes

Great! Thanks.
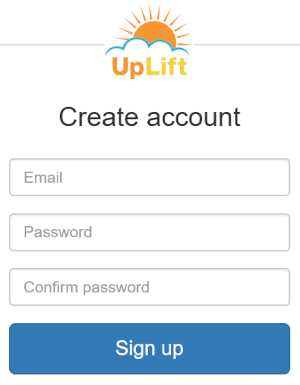
In this program, users will see the first line of text. Then, they will see a "Next" button. After clicking the button, they will be presented with a popup asking them to login or sign up for a GuidedTrack account. Once they do either, they will see the last line of text, "Great! Thanks."
In our example, the *login keyword causes the popup screen to appear, but the additional *required keyword, with its value of "yes" tells the program that logging in is required in order to continue with the program. You can also make it optional for users to login, as in our next example.
If you'd like to have the results of your "What type of exotic fruit are you?" quiz emailed to you, please login or create an account on the next screen. Otherwise, you'll only be able to view the results in the program.

*login
	*required: no

Thanks, here are your results...
As this example shows, you can set the *required keyword to "no." All users will be given the option to login, but whether they login or not, they will still make it to the next line of text, which begins with "Thanks." By the way, if you'd like to know how to setup an email to send to your users (as mentioned in this example but not explicitly shown), then click here.
One last thing: you don't have to type in *required: no in order to make the login optional. Simply writing *login without the *required keyword will produce the same result, giving users a non-mandatory opportunity to login if they desire.
Now's your chance to login, if you'd like to.
*login
Great, moving on.
If users decide to log into your program whether you require it or not, then their progress will be saved. However, you should also consider whether you need to ensure that the settings are set (as described above) so that a login screen pops up whenever users start your program. That way, they're immediately given an option to login and pick right back up from where they left off. (The *login keyword on its own without the settings set to ask for a login at the beginning doesn't effectively help the user return to their saved progress.)
Add your logo to logins🔗
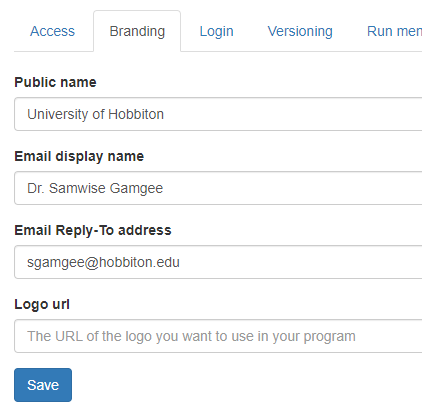
You can also add your logo to the sign-up/sign-in page, like so:
From the "Settings" tab, under "Branding" you'll see a spot to add your logo. By adding your public name and an email display name, you'll also ensure that the sign up confirmation email displays your name as well as your logo.
Next: Maintaining text on the screen