Custom Services🔗
We've seen how you can connect to other tools using
*service. But
what if what you need is custom back-end logic? This would be the case
if you wanted to, for example:
- securely connect to a system as an admin
- implement quotas
- compare a user's results to a real-time average of other users
- give different users separate permissions
Just like external APIs you might have used with *service, custom
services are just a collection of "routes" – addresses where *service
can send requests and receive data in response. Each route is defined by
(1) an HTTP method and (2) a path.
Route HTTP methods🔗
The HTTP method of a route describes the kind of action you want to take. Methods are one of the following:
- GET: Ask for information (like reading data).
- POST: Send new information (like creating something).
- PUT: Update existing information completely.
- PATCH: Update part of existing information.
- DELETE: Remove something
Route paths🔗
The path of a route defines what resource you want to interact with.
Together, a route method and path describe the function of a route. This is best illustrated via an example.
Let's say you want your custom service to power a to-do app, specifically to handle storing to-do tasks. You therefore might want to define the following routes for the different use cases your app would eventually support:
GET /tasks: load all the current tasksPOST /tasks: create a new taskPUT /tasks(expecting anidparameter): update the task with the given IDDELETE /tasks(expecting anidparameter): delete the task with the given ID
The specifics of how you design your custom service are up to you, but the above represents standard best practices.
A Simple Example🔗
Step 1: Set up the custom service🔗
To start, go to the Custom Services page. You get to it by choosing the "Custom Services" tab from the home page after you've logged in:

Once there, click the "New custom service" button to get started. A modal dialog will show up, allowing you to name your custom service.
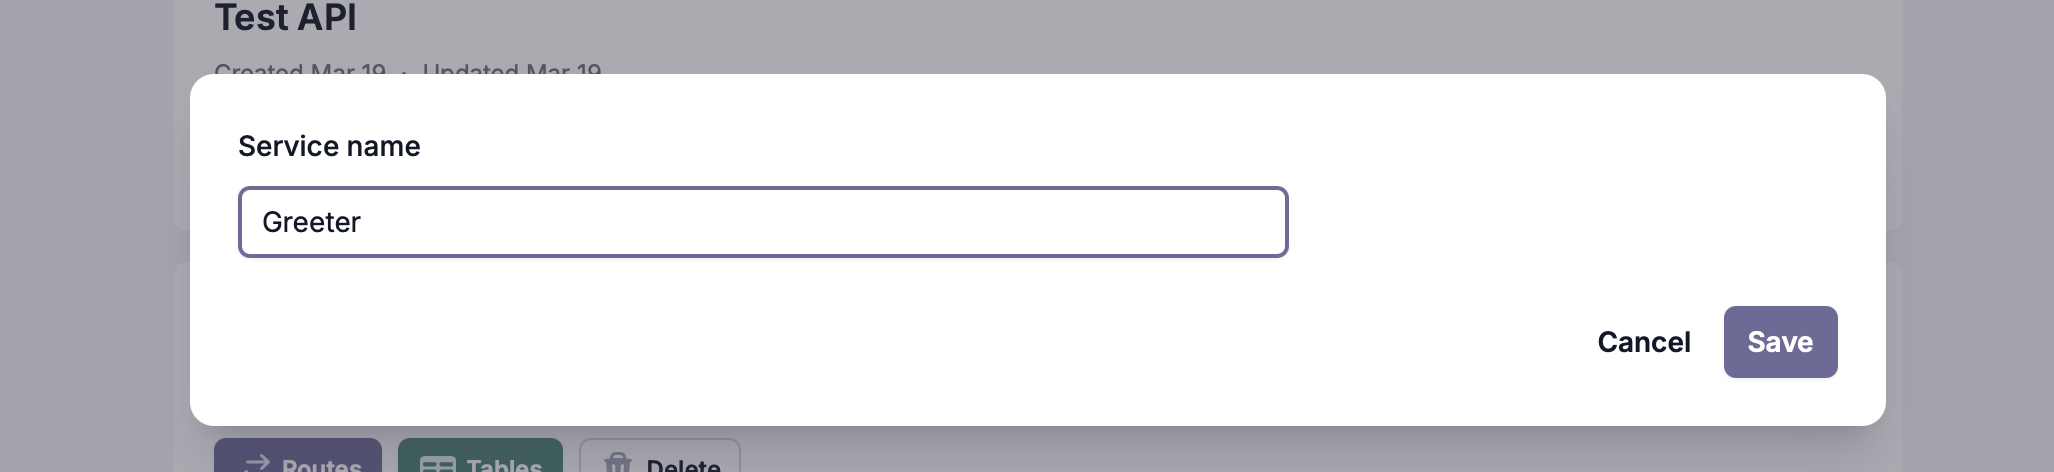
You can name your service anything you like, just like programs. Hitting "Save" above will set up a new service and drop you into it:

Step 2: Create a route🔗
The first thing we'll need is a route. All we're looking to do is to say
"Hello" to our user, so GET /greeting seems appropriate. Click the
"New route" button and create that route:
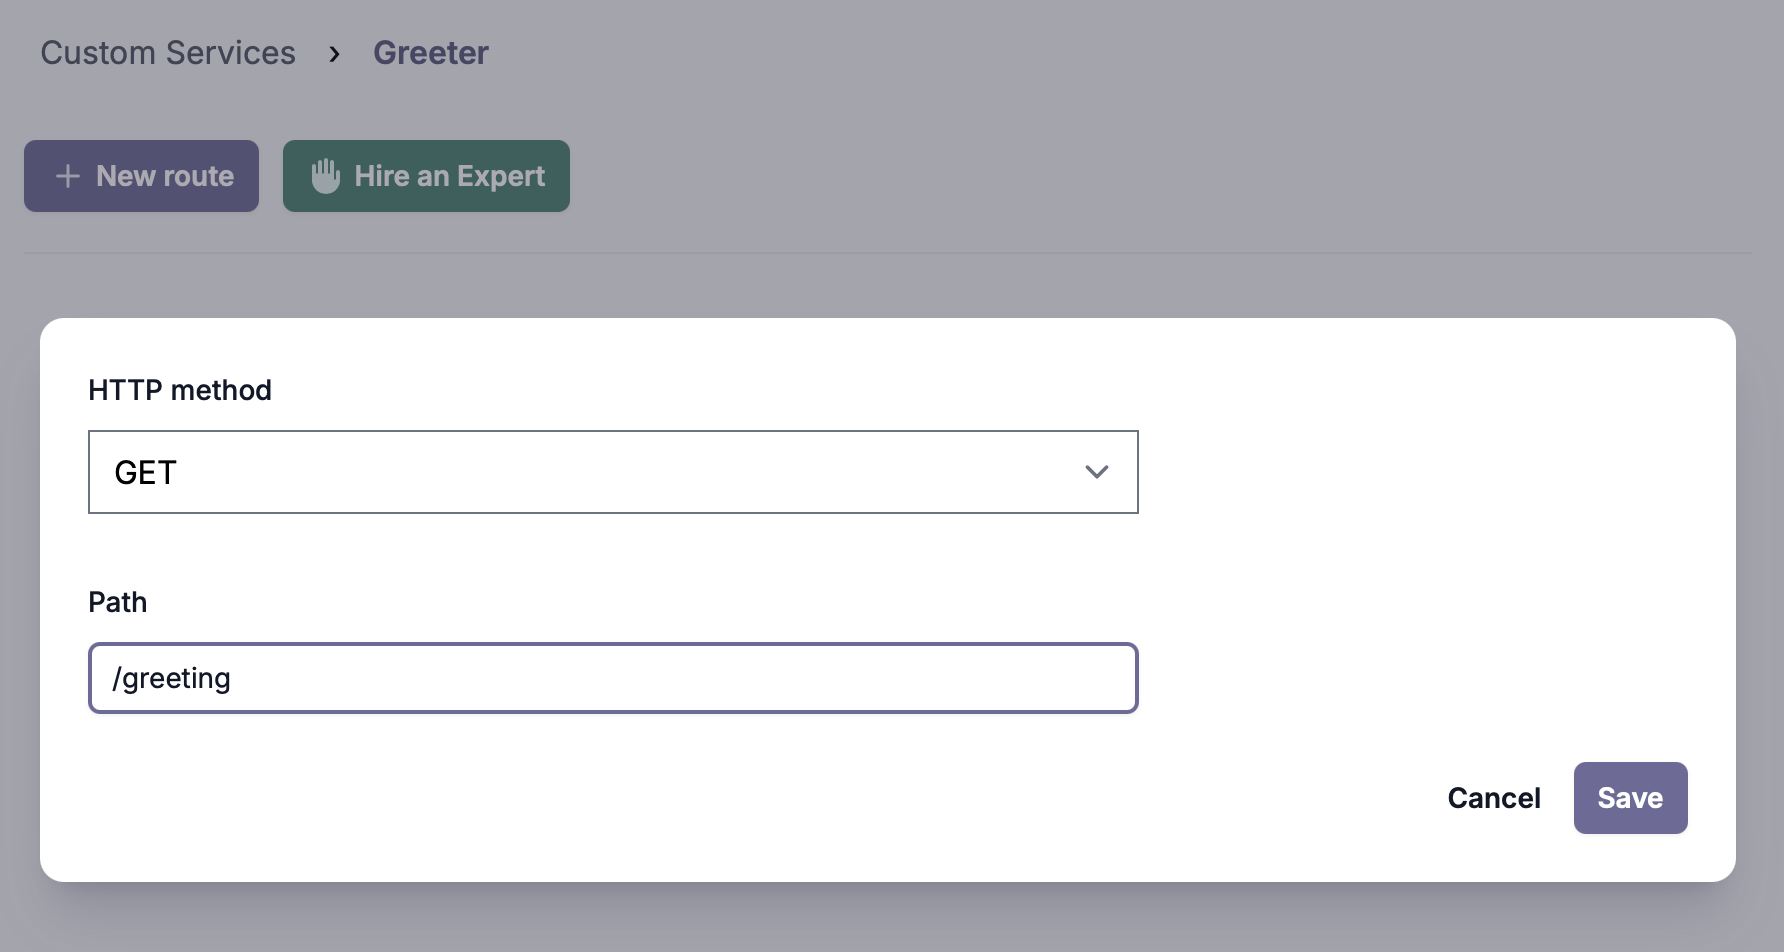
Hitting "Save" in the dialog above will create the route and drop you into its edit screen:
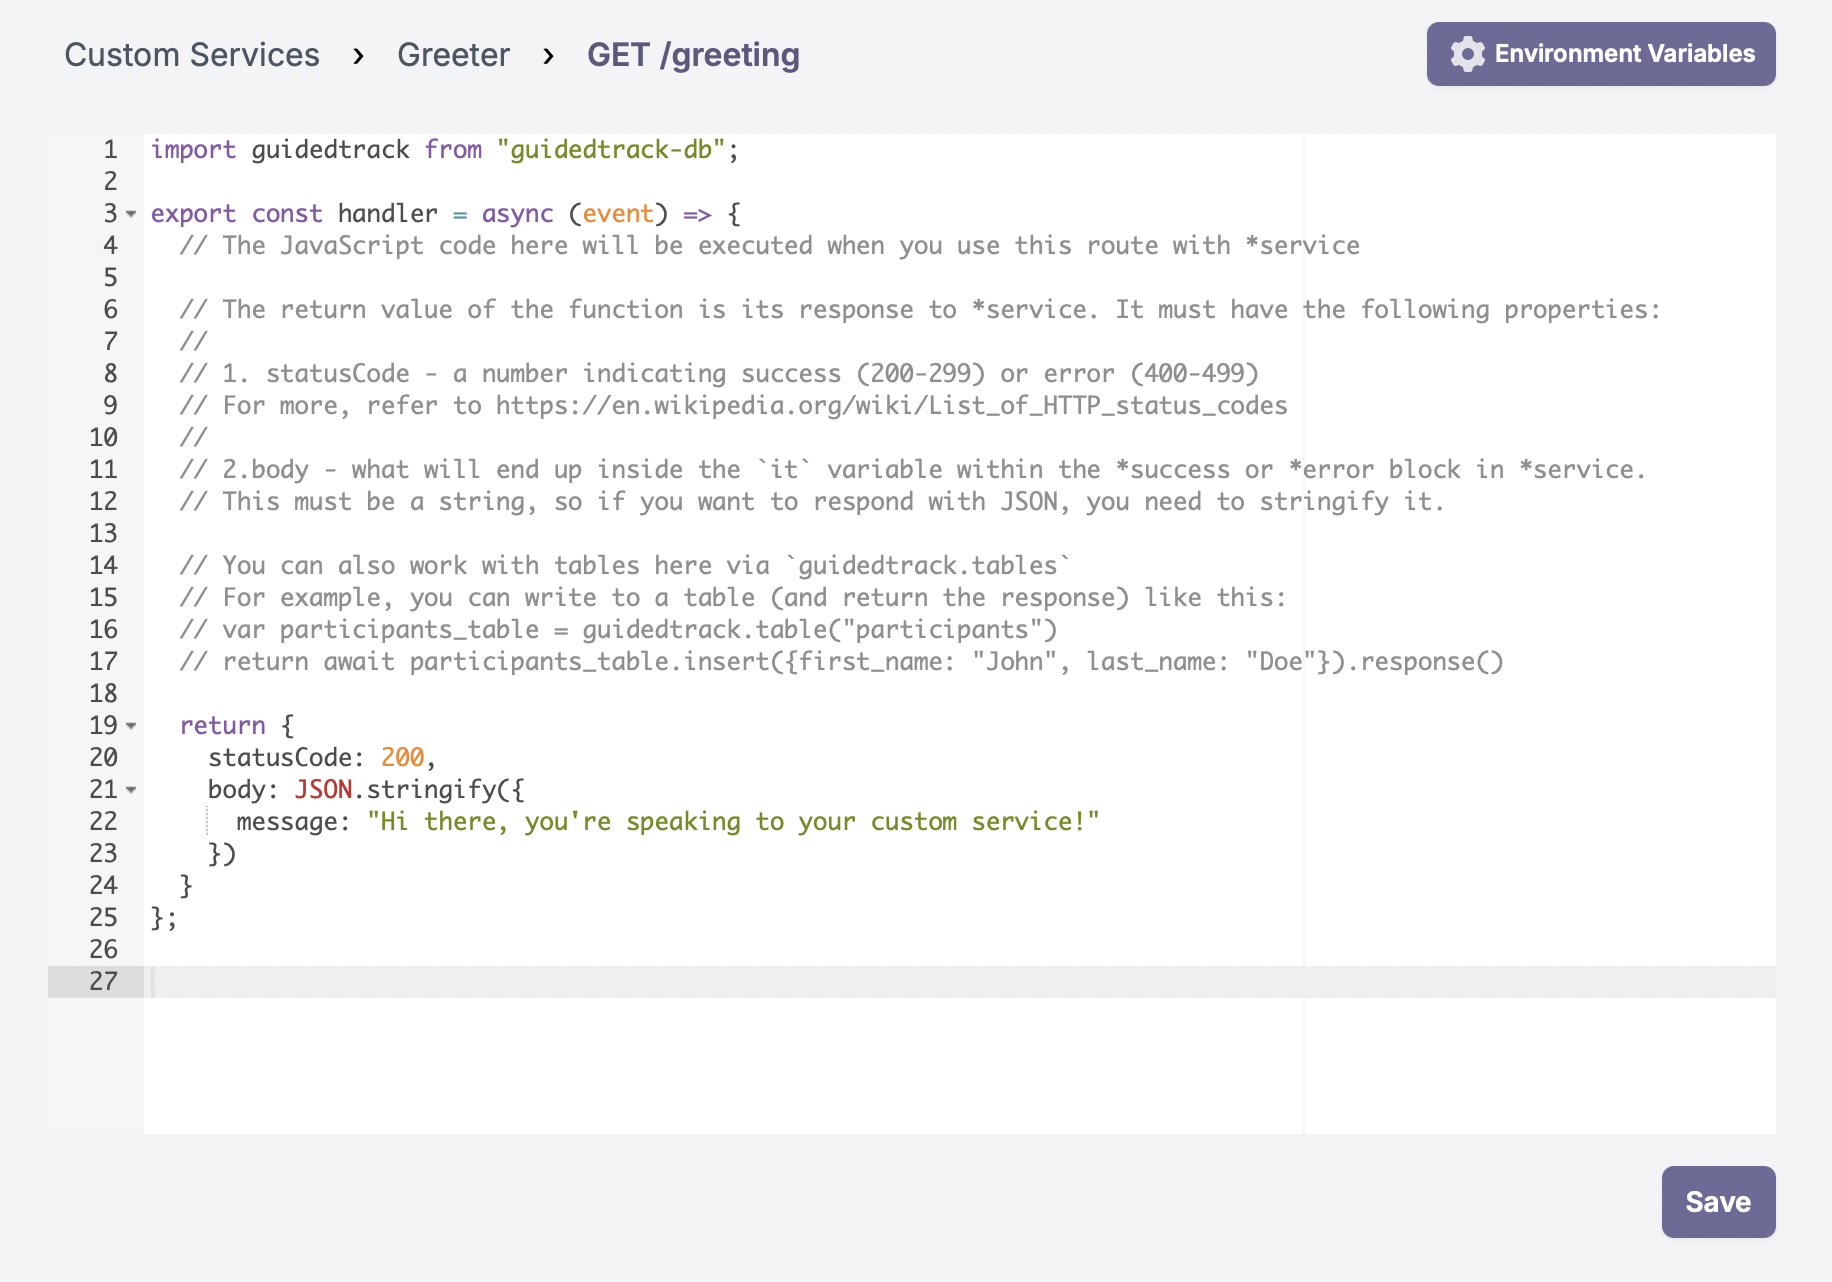
Here you get to write the code that actually gets executed when the route is hit.
Step 3: Edit the code to do what the route needs to do🔗
Within the route code, you have the full power of JavaScript at your disposal, so there are virtually no limitations on what you can do. There are two important requirements to keep in mind:
Requirement 1: The code must not take longer than 10 seconds to execute
The servers who will run the code you create will kill any request that takes too long in order to ensure the stability of the system overall. You therefore need to design your routes in a way that allows them to do their work relatively quickly. That shouldn't be a problem – computers can do a lot in 10 seconds – but you might find you're running into trouble if you're doing a lot of slow operations (such as hitting multiple external APIs) within your route code.
Requirement 2: Each route must return a response object
That's what the final statement of the route we just created does:
  return {
    statusCode: 200,
    body: JSON.stringify({
      message: "Hi there, you're speaking to your custom service!"
    })
  }
A valid response object has a statusCode field, indicating the
appropriate HTTP status
code. It also
has a body field with the data to respond with.
In our case, we're looking to respond with some sort of a greeting, which the default route code already does. We therefore don't need to change anything about it.
Step 4: Connect the custom service to a program🔗
This is analogous to the steps you would take to connect a program to an external service. The main difference is the service we're setting up isn't external, but is instead one we've built.
To connect our newly created service to a program, visit the Settings page of the program you want to connect and select the "Services" tab:
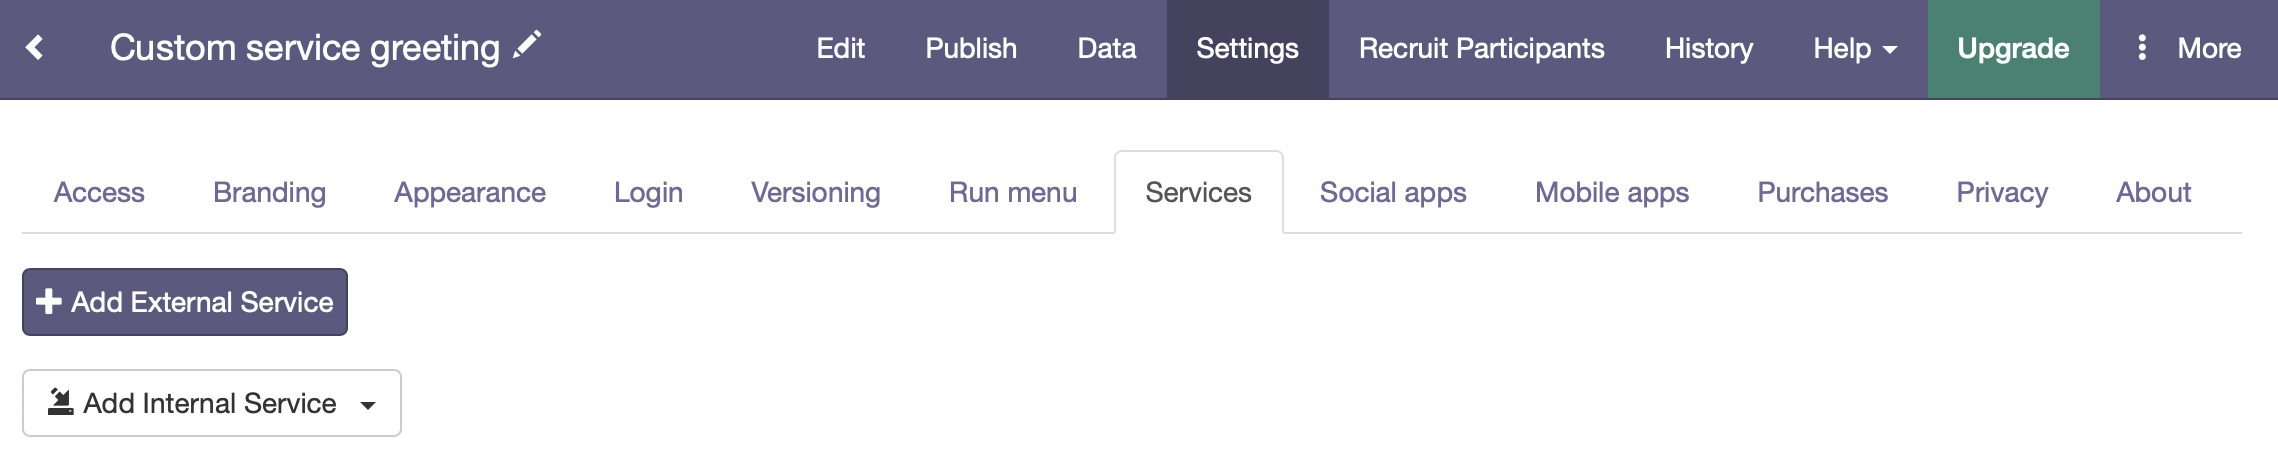
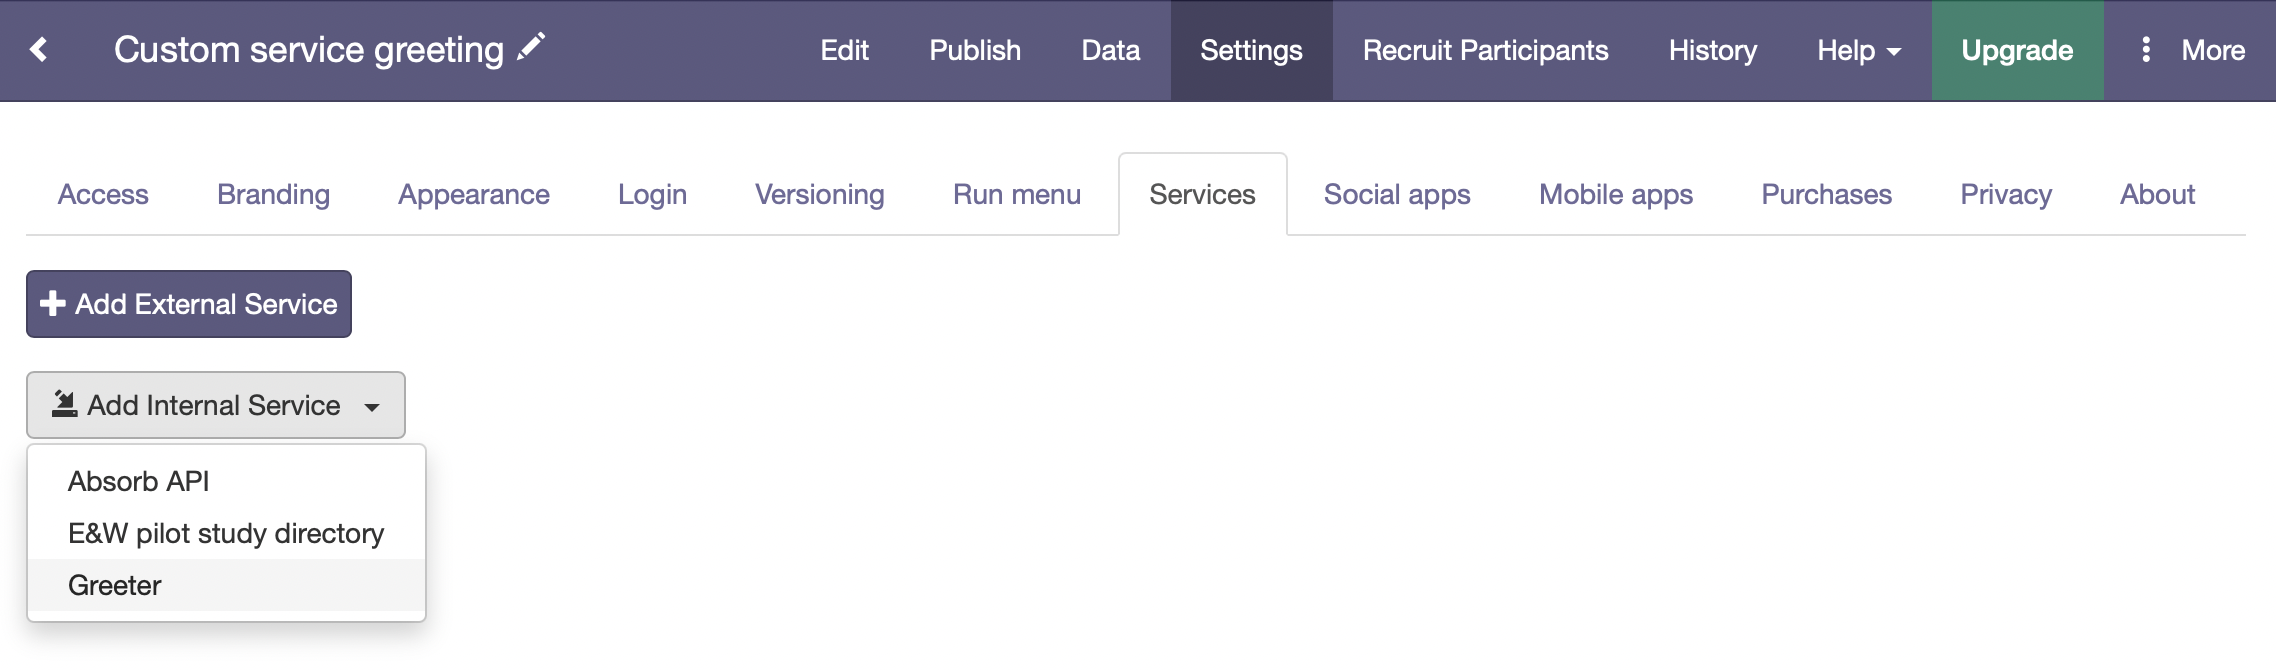
Choose the "Add internal service" button and select the service we just created ("Greeter") from the dropdown:
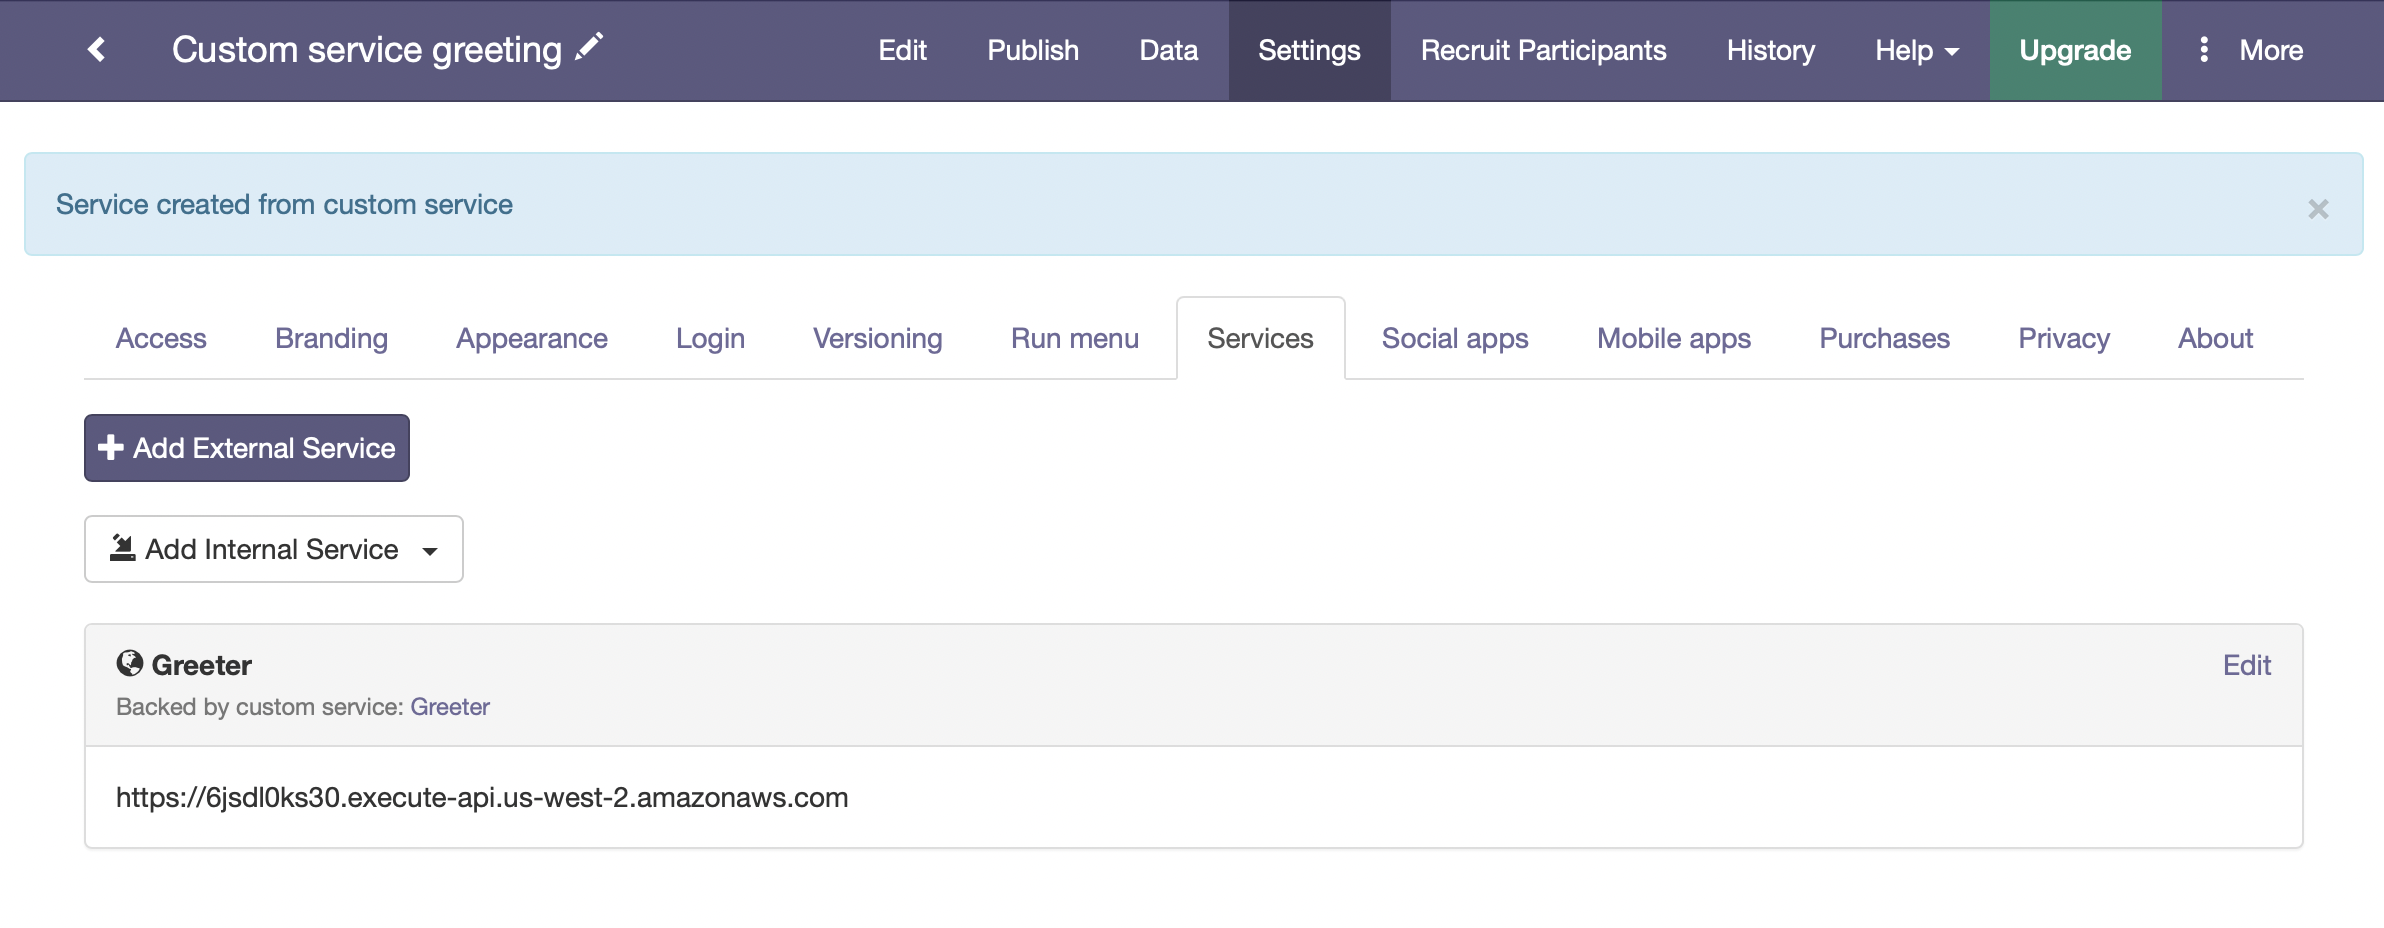
Confirm the creation of the service and you'll see it in your services list:
Step 5: Use the service within your program🔗
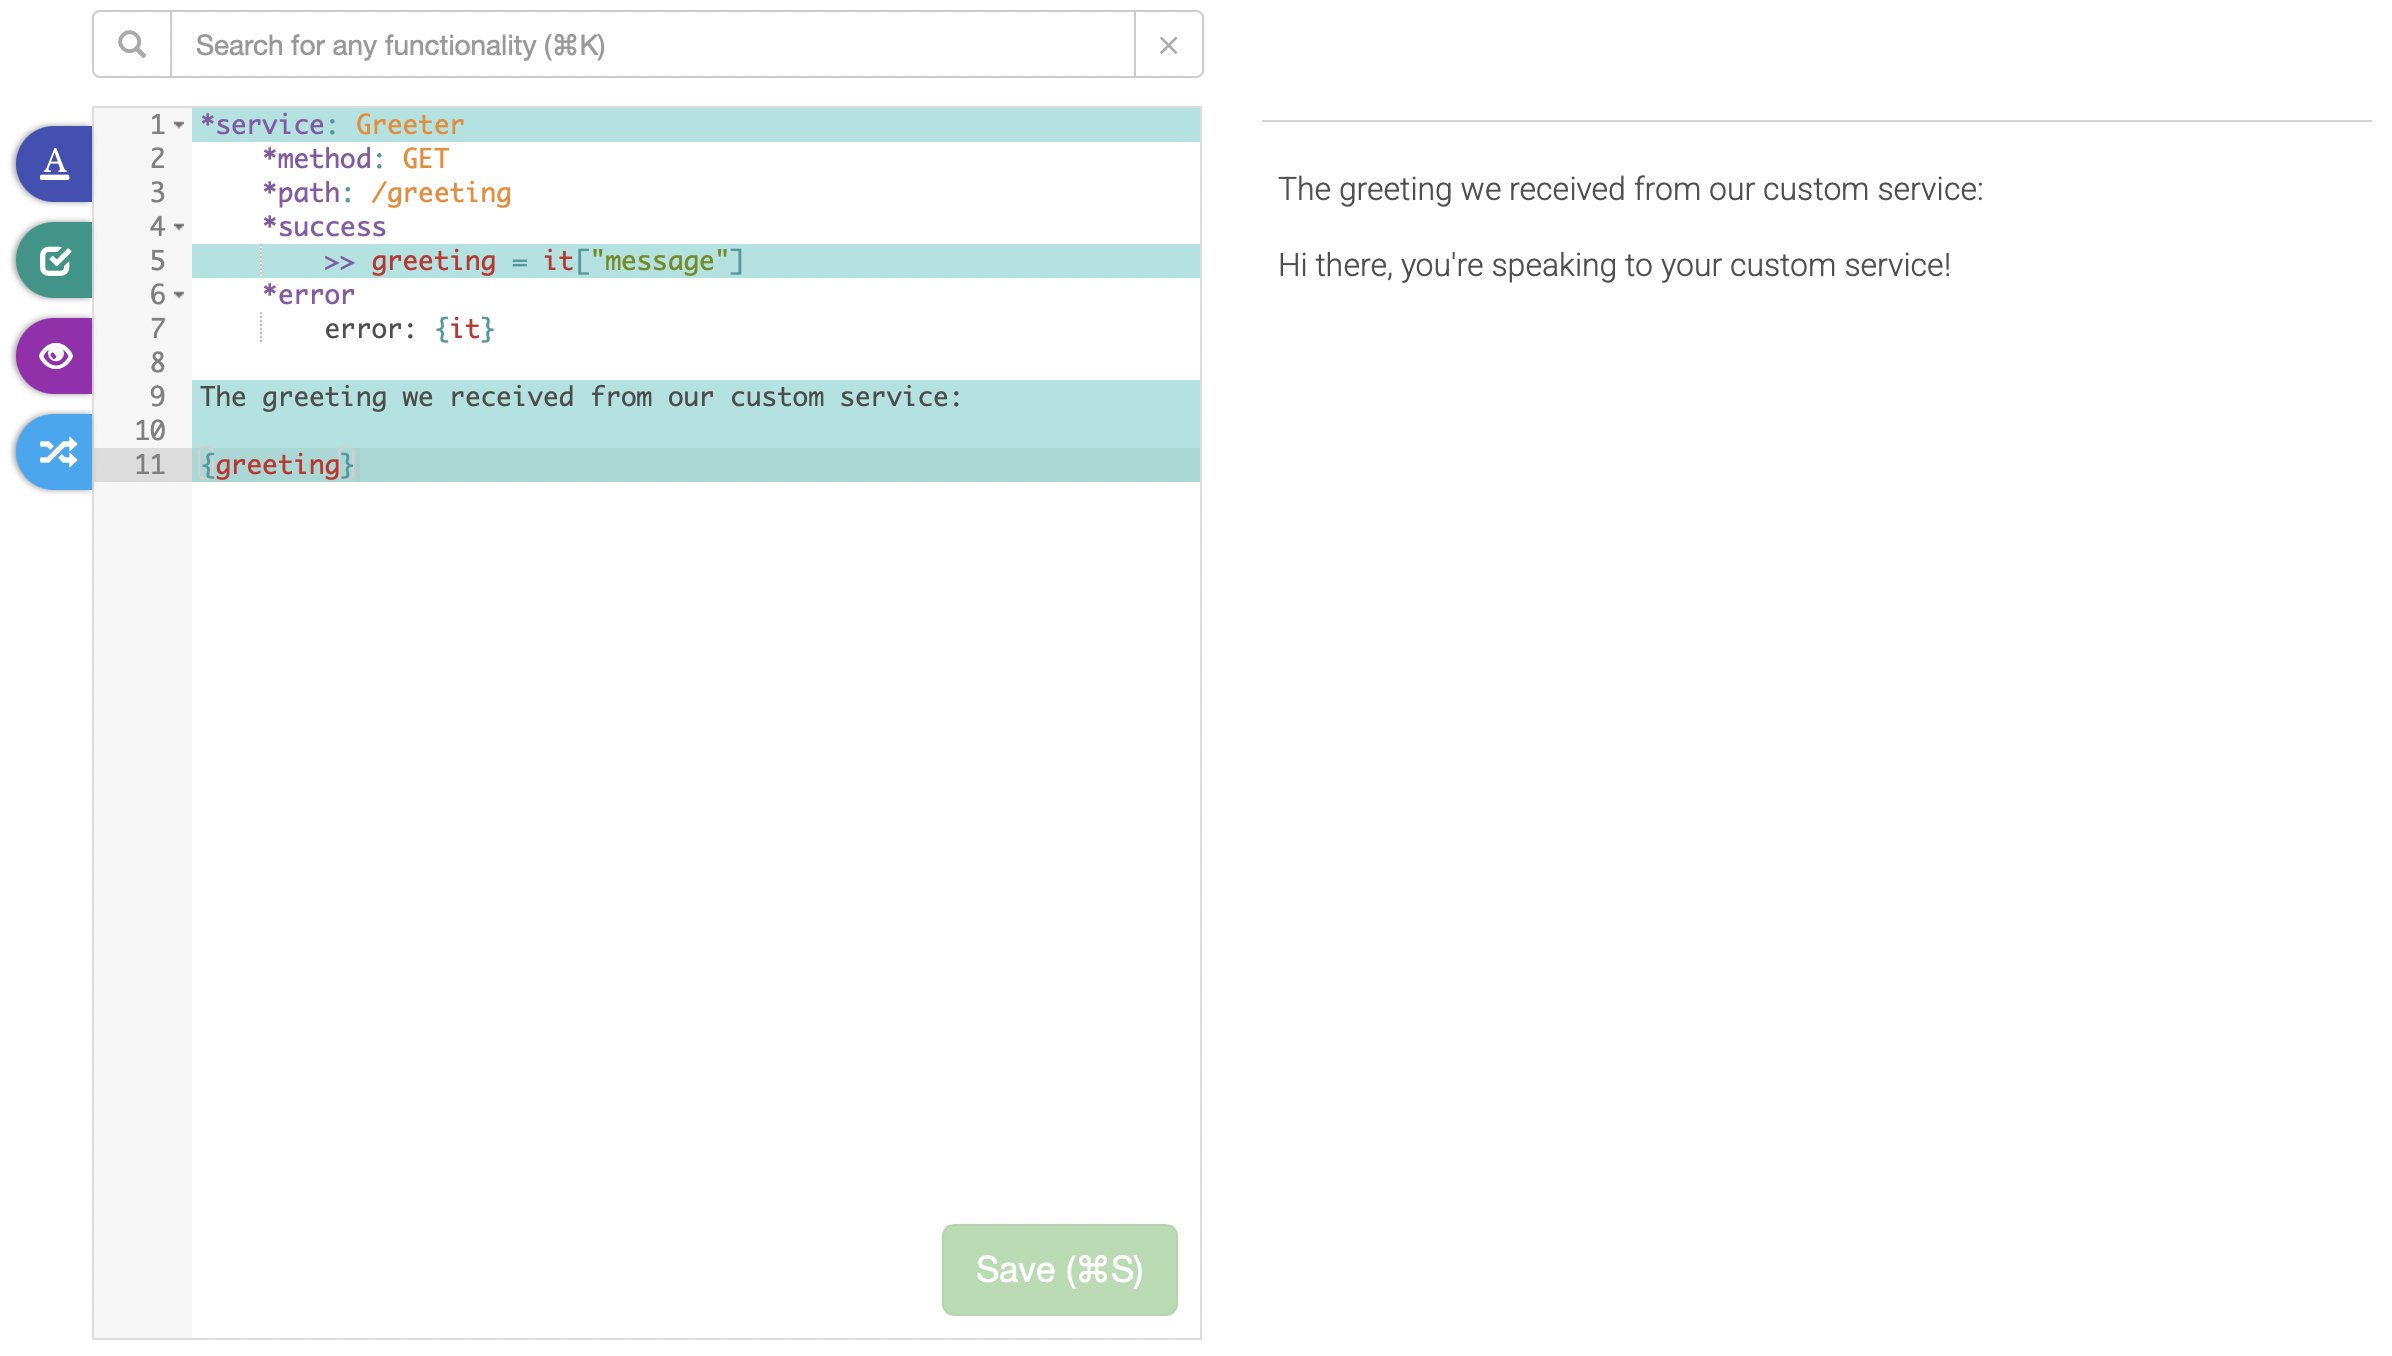
Within your GuidedTrack program, using internal services works exactly the same way as external services. Add the following code to your program:
*service: Greeter
	*method: GET
	*path: /greeting
	*success
		>> greeting = it["message"]
	*error
		error: {it}

The greeting we received from our custom service:

{greeting}
When we run the above, we see we can get a response from our custom service:
Advanced Example: Working with Tables🔗
So far we've seen that Custom Services allow you to run your own back-end code, which allows you to integrate with any system you like.
That makes Custom Services very capable, but their real power lies in that they are connected to a centralized database. You can now build tools that require central coordination without relying on external services like Airtable to store the bespoke data backing your tool.
Here's a sample of the things a centralized database allows you to do:
- pipe answers by the same participant across surveys
- compare a current user score to an average or recent scores
- limit how many times a certain thing can happen (e.g. quotas)
- implement role-based permissions (different types of users can do different things; e.g. teachers and students)
- allow users to communicate between each other in real time
Related documentation
The tools that allow you to perform the operations described in this
section (and more) are
provided via the guidedtrack
library, which is automatically
loaded within each of your routes.
It's a good idea to take a look at the guidedtrack library
docs in
order to be aware of the full capabilities.
All of the above and more can be done by creating tables for your custom service and utilizing the following basic operations:
- Inserting a record
- Finding a record by its ID
- Searching for records
Inserting a record🔗
Suppose we're running a longitudinal study for which we'd like to allow participants to register. Upon registration, we save their name and email, and generate a random participant ID.
We can implement enrollment by writing a new entry into the
participants table. Here's how to do that.
1. Create the insert route🔗
A natural name for a route to insert a participant is POST /participants. Create such a route by following the route creation
instructions.
2. Paste in the code to insert a record🔗
The JavaScript code you'll need to insert a new record is the following:
import guidedtrack from "guidedtrack-db";

export const handler = async (event) => {
    var data_sent = JSON.parse(event.body);

    return await guidedtrack.table("participants").insert(data_sent).response();
};
The above takes the data sent to the route, parses it as JSON, writes it
into the participants table, and responds with a JSON object that
includes a randomly generated ID under the id field.
3. Use the insert route within a GuidedTrack program🔗
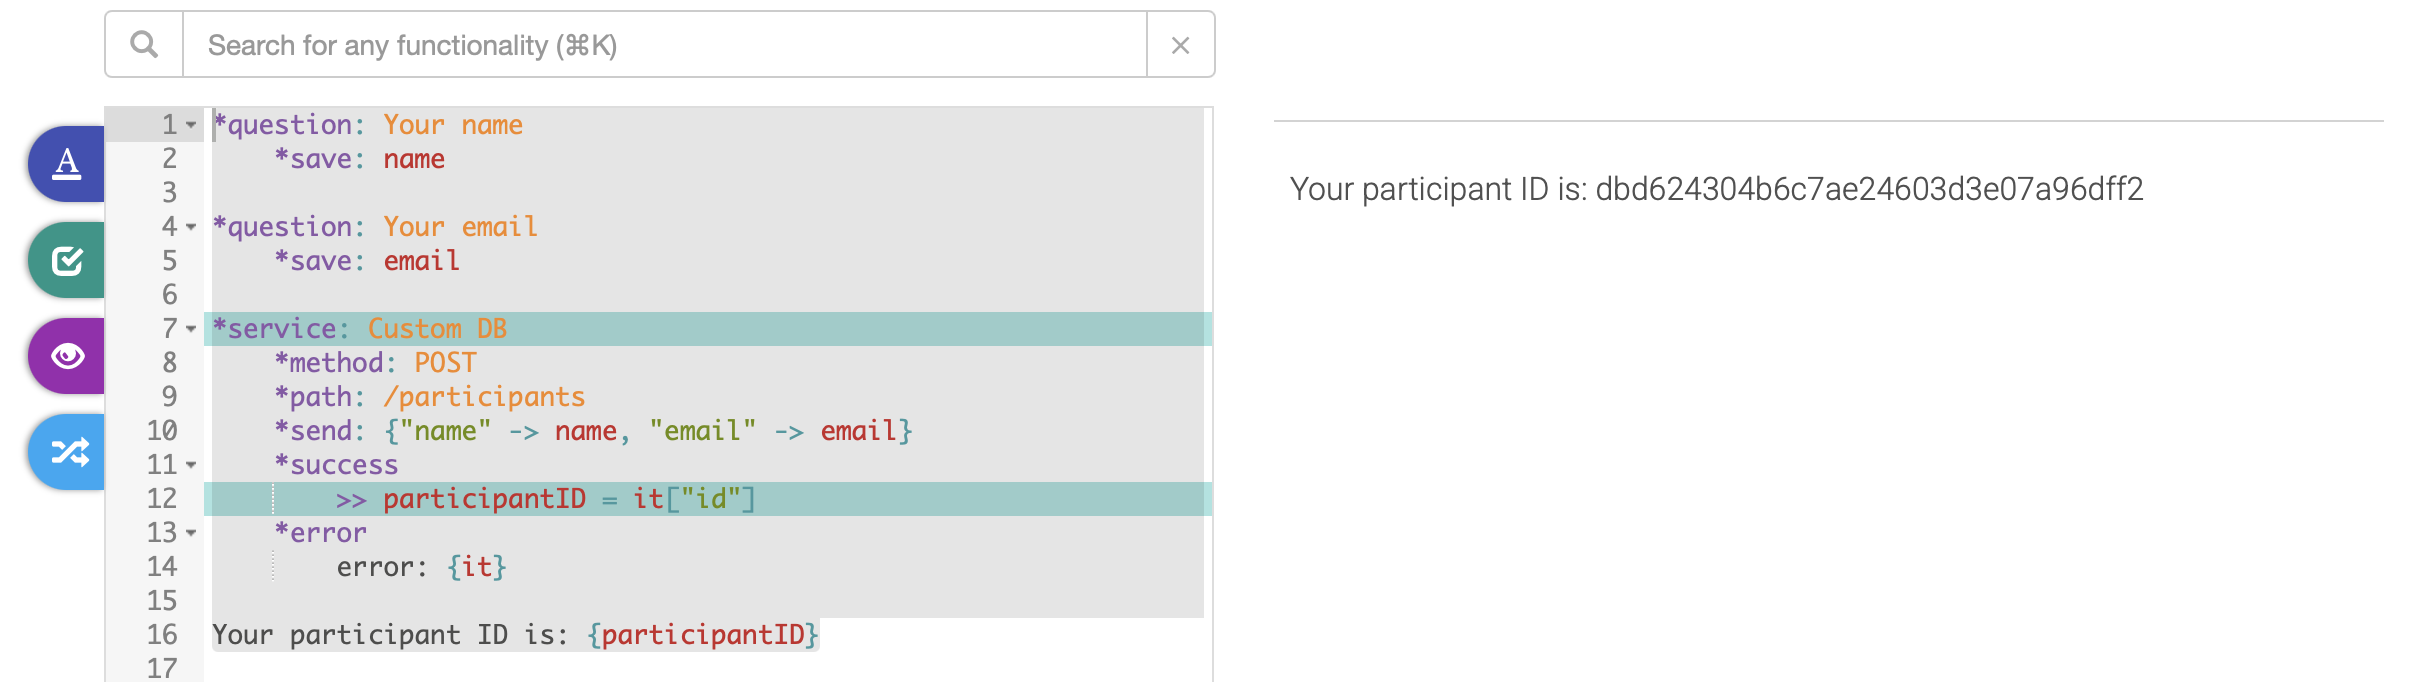
First, make sure the program is connected to your custom service. Then, use the route like so:
*question: Your name
	*save: name

*question: Your email
	*save: email

*service: Custom DB
	*method: POST
	*path: /participants
	*send: {"name" -> name, "email" -> email}
	*success
		>> participantID = it["id"]
	*error
		error: {it}

Your participant ID is: {participantID}
Running the above will insert the record as expected:
And you can confirm the data is saved by first navigating to the tables page of your custom service:

Then, looking at the participants table:
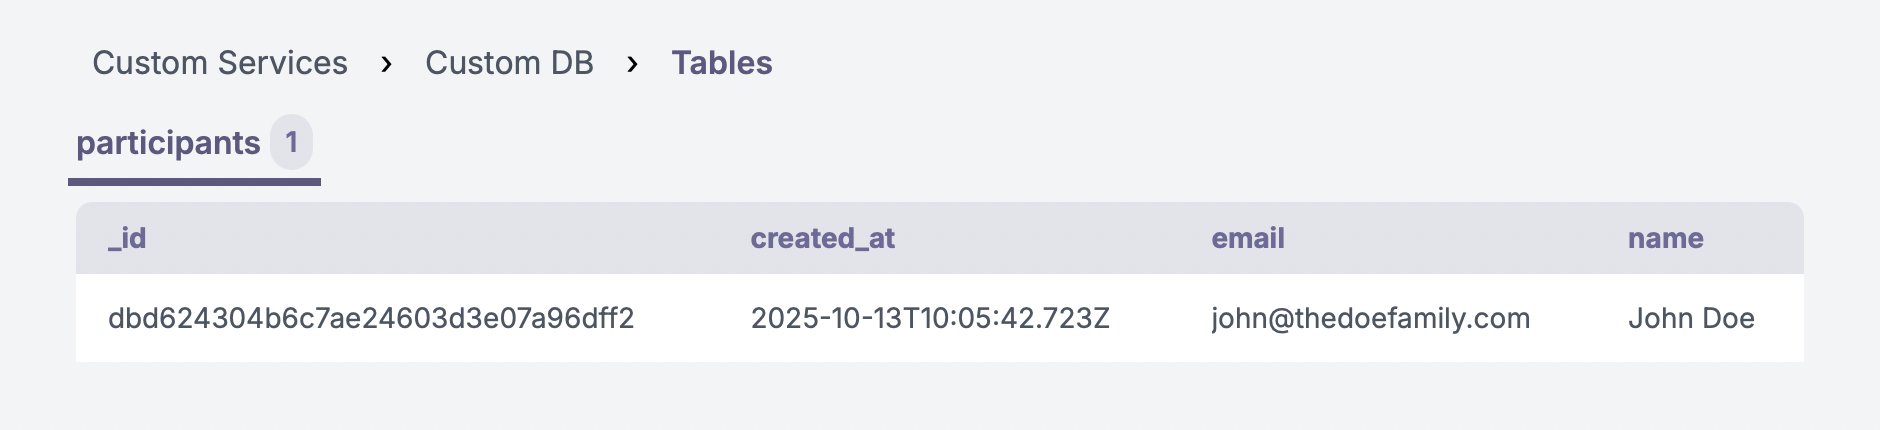
You'll note that the keys of the association you send to the route
become the columns of the table. Their values are what's filled into the
appropriate table cell. Crucially, each row of the table has a unique ID
in the _id column – that's the randomly generated participant ID. Each
record also automatically records the time it was inserted into the
table via the created_at column.
Finding a record by its ID🔗
Now that we are inserting records into the participants
table, let's see
how we can look participants up by their participant ID to "log them
in".
1. Create the find route🔗
A natural name for a route to look up a participant by ID is GET /participants. Create such a route by following the route creation
instructions.
2. Paste in the code to find a record by ID🔗
The JavaScript code you'll need to find a record by its ID is:
import guidedtrack from "guidedtrack-db";

export const handler = async (event) => {
    var id = event.queryStringParameters.id;

    return await guidedtrack.table("participants").find(id).response();
};
The above looks for an id query parameter in the path of the route. It
then grabs its value, looks up that record in the participants table,
and responds with a JSON object containing the data in the row found.
3. Use the find route within a GuidedTrack program🔗
First, make sure the program is connected to your custom service. Then, use the route like so:
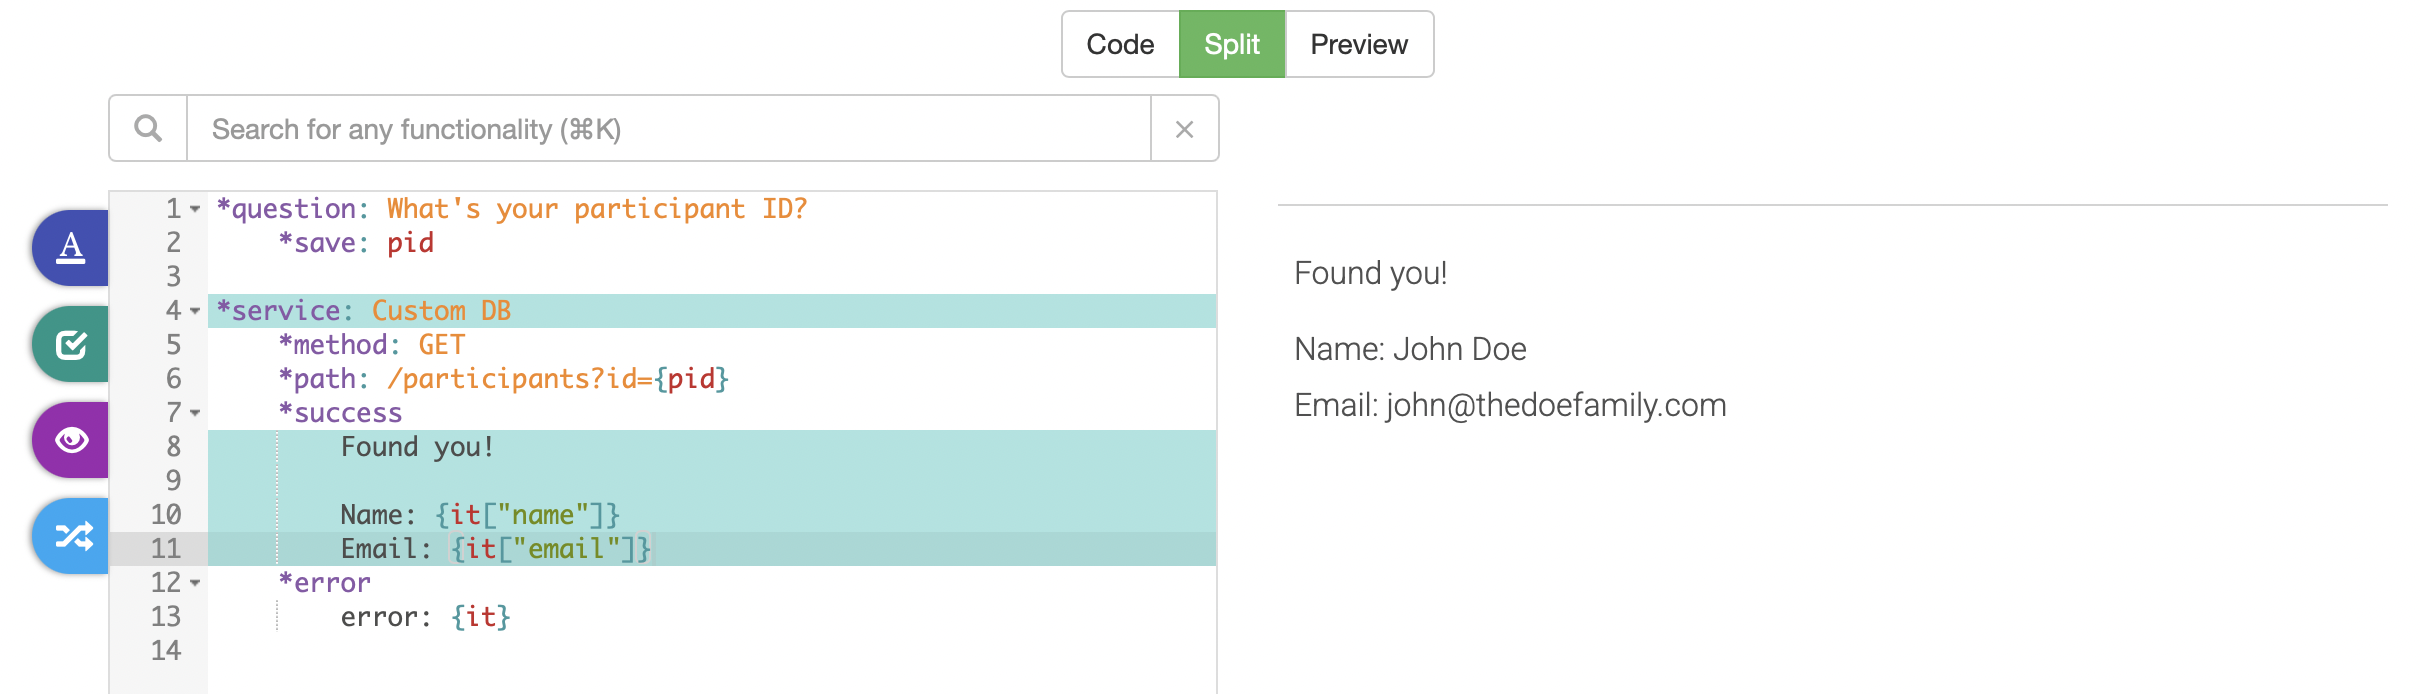
*question: What's your participant ID?
	*save: pid

*service: Custom DB
	*method: GET
	*path: /participants?id={pid}
	*success
		Found you!

		Name: {it["name"]}
		Email: {it["email"]}
	*error
		error: {it}
Running the above will find the record as expected:
You can combine the above approach with URL-injected variables to create magic links to the surveys within your longitudinal study, so participants are logged in and recognized by the system seamlessly.
Searching for records🔗
Looking up single records by their ID is all well and good, but what if
your use case calls for searching through your table for all records
matching some criteria? This is what the .search function is for.
1. Create the search route🔗
A good name for a route to search through the participants table is
POST /participants/search. Create such a route by following the route creation
instructions.
2. Paste in the code to search participants🔗
The JavaScript code you'll need to search for records is the following:
import guidedtrack from "guidedtrack-db";

export const handler = async (event) => {
    var query = JSON.parse(event.body);

    return await guidedtrack.table("participants").search(query).response();
};
Please note the above will allow any user to search for participants using any criteria. It's usually a good idea to check whether the request seems legitimate (i.e. figuring out, in code, whether the query received really could be issued from one of your programs).
3. Use the search route within a GuidedTrack program🔗
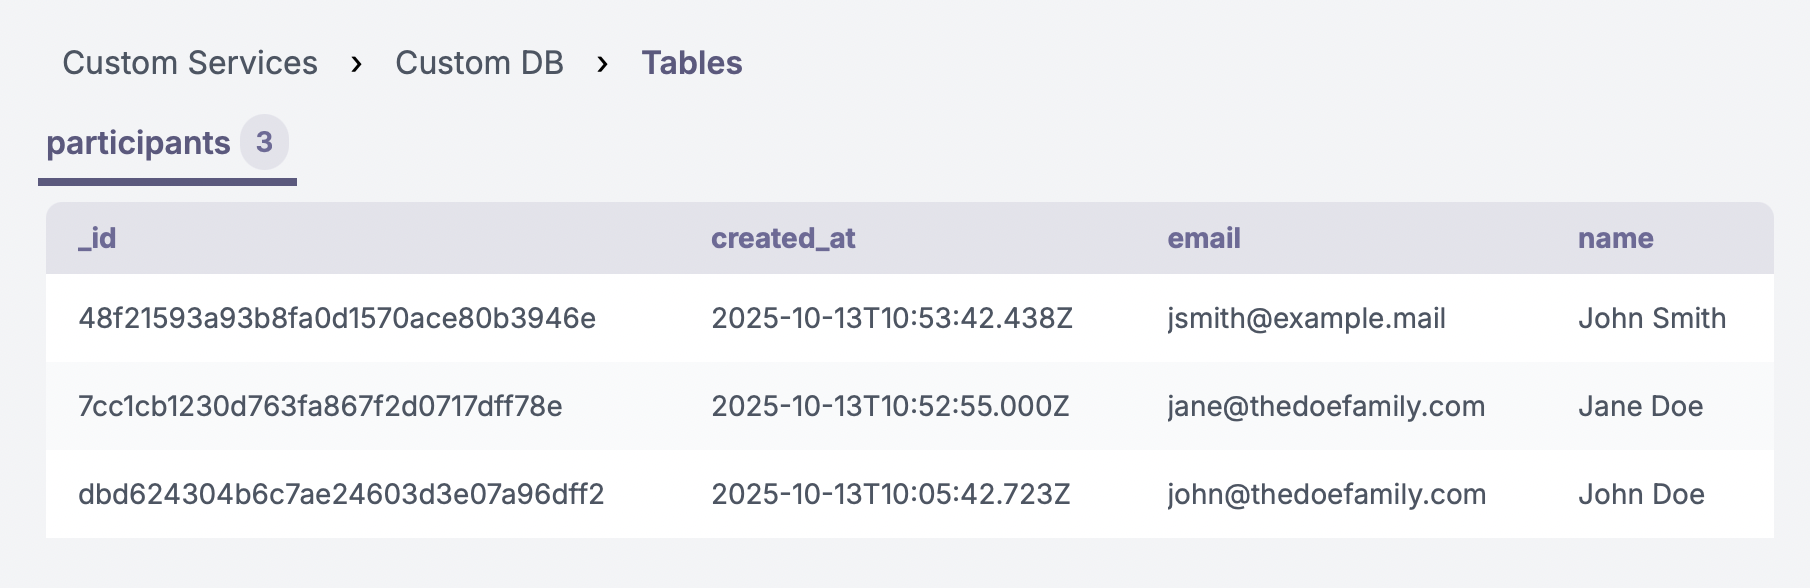
Suppose we want to search the participants table, which currently has
three records:
| ID | Name | |
|---|---|---|
| 48f21593a93b8fa0d1570ace80b3946e | John Smith | jsmith@example.mail |
| 7cc1cb1230d763fa867f2d0717dff78e | Jane Doe | jane@thedoefamily.com |
| dbd624304b6c7ae24603d3e07a96dff2 | John Doe | john@thedoefamily.com |
This is what you'd see in the tables page of your custom service if this is the case:
To use the search function, we need to send it a selector describing the criteria we want to search by. The selector has to be a valid Mango selector – please refer to the Mango Query documentation for all the options.
Below are some useful examples to get you started.
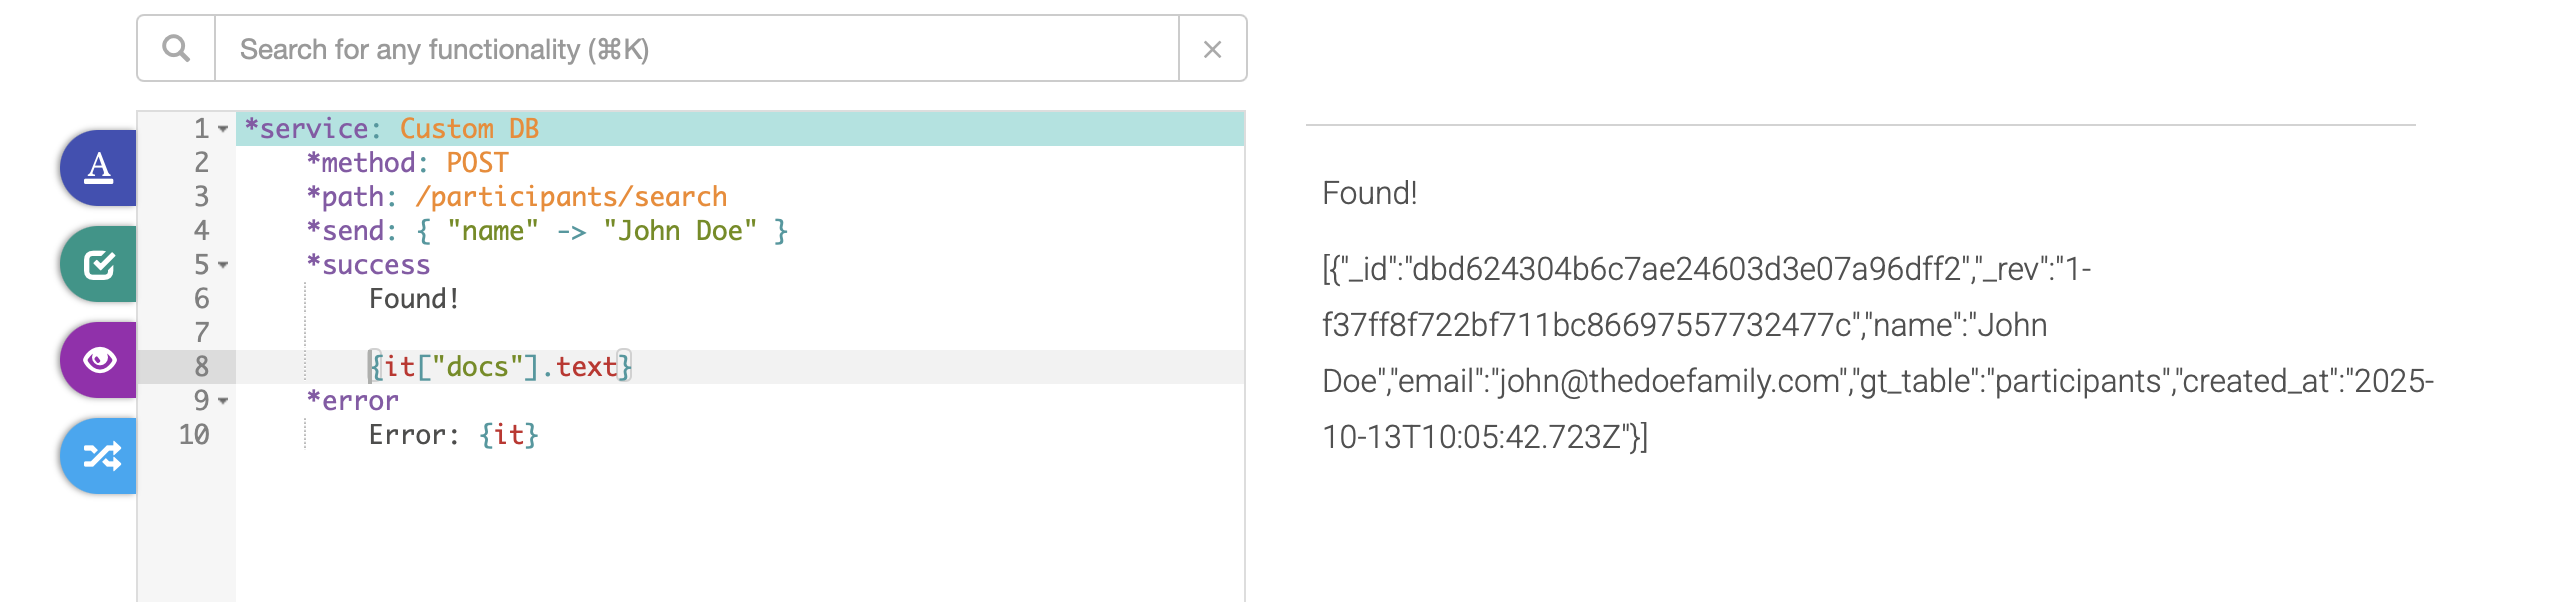
Example 1: Find records where the name is "John Doe"
*service: Custom DB
	*method: POST
	*path: /participants/search
	*send: { "name" -> "John Doe" }
	*success
		Found!

		{it["docs"].text}
	*error
		Error: {it}
Running the above will result in displaying a collection containing the one record where the name is "John Doe":
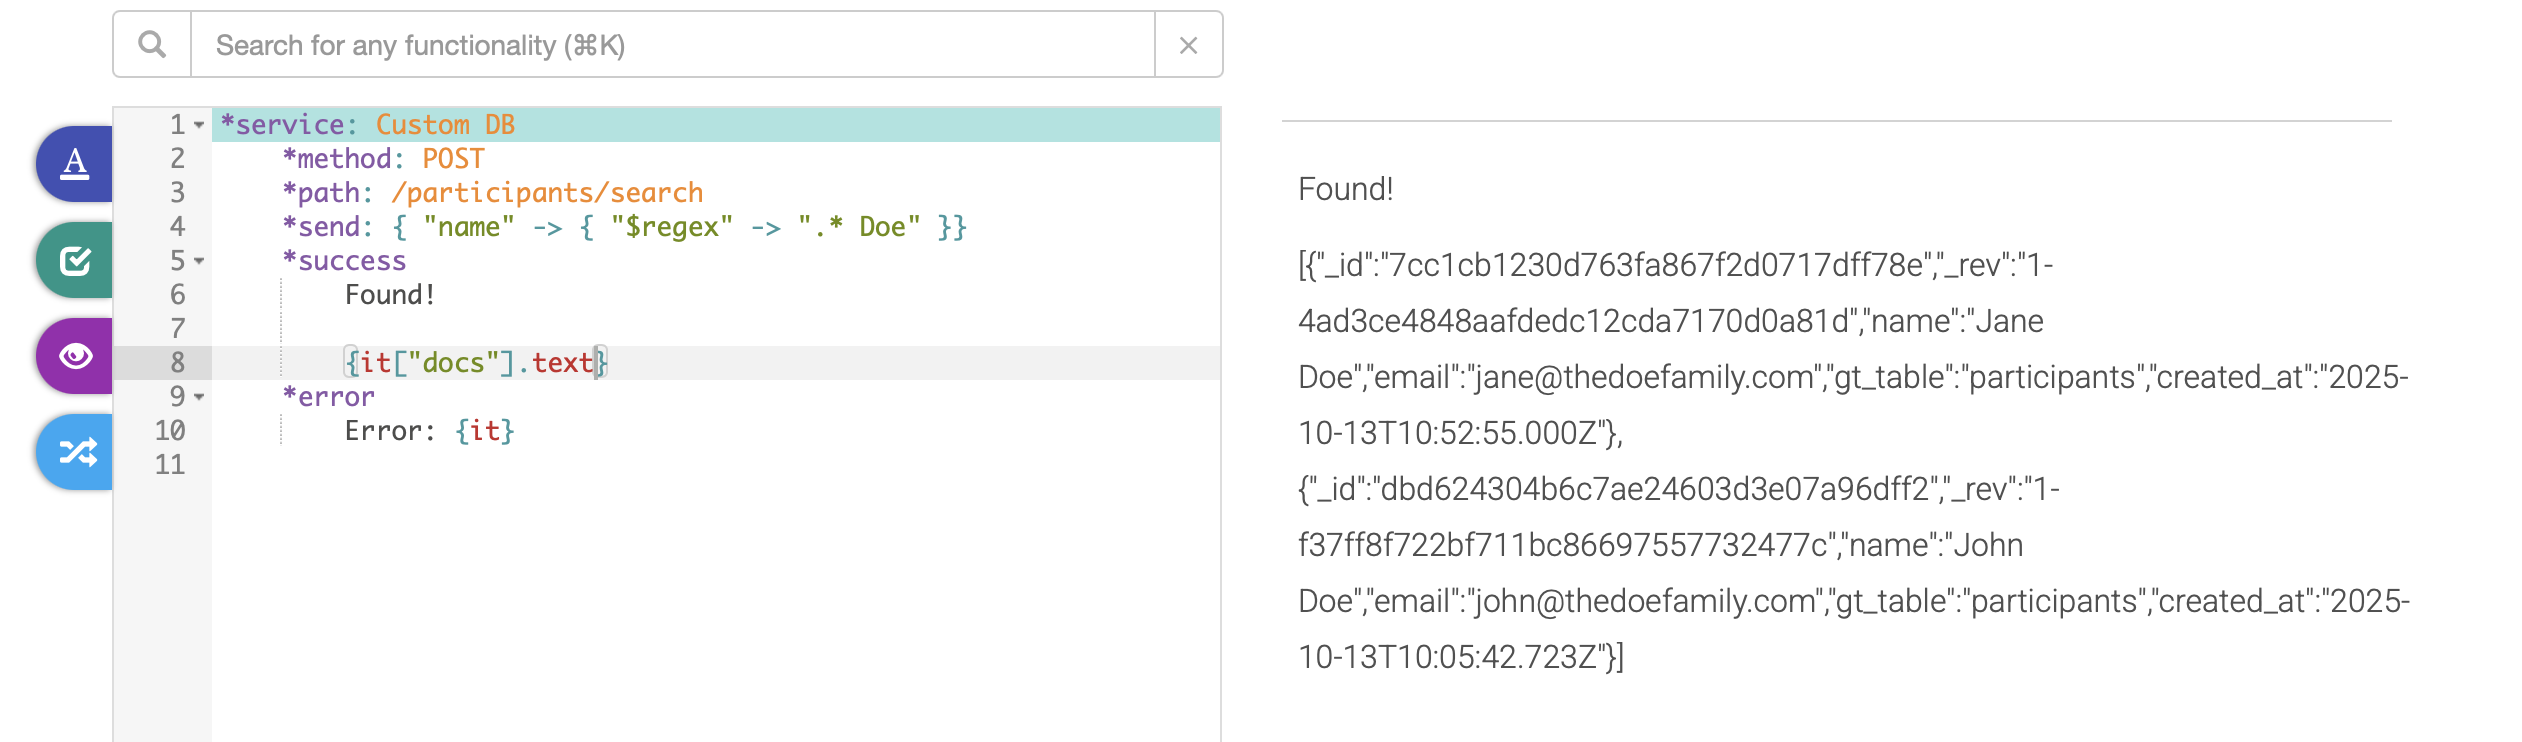
Example 2: Find all records where the last name is "Doe"
*service: Custom DB
	*method: POST
	*path: /participants/search
	*send: { "name" -> { "$regex" -> ".* Doe" }}
	*success
		Found!

		{it["docs"].text}
	*error
		Error: {it}
Running the above will result in displaying a collection containing both records that end with " Doe":
Next: In-app `*purchases`